Okay, so I am going to do my best to quickly and efficiently share with you all how I used my iPhone to make some photo artwork for my daughter’s room.
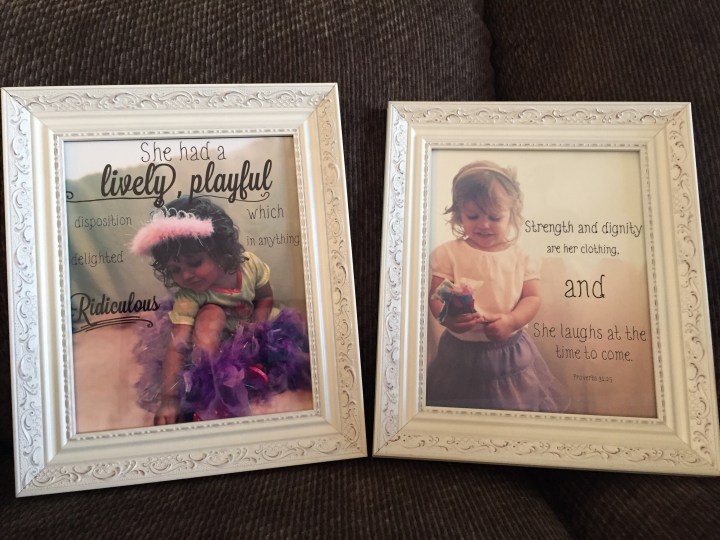
I snapped a couple of pictures on my phone and turned them into these sweet pieces of art to be framed and hung in her room.
First thing I did, was use my iPhone camera to take some pictures of my daughter. This was the most challenging part of the whole project. Small children like to move around a lot, they like to move around in fast jerky motions that do not look very becoming on pictures taken from a camera phone.
Once you have found a picture you would like to use, it is time to start your creation.
1. I used one of my camera editing apps to get the right filter for my picture.
2. From that app,
- I selected my picture that I wanted to edit. Clicked on “effects”. Then I chose the right one for my picture. (I am pretty sure I used “Keylime” as the filter effect for both of my pictures.)
- I selected the “blur” option from the bottom of “task bar” and blurred out some of background and bottom edges.
- After I selected the effect and blurred the parts of the picture I wanted to, I saved my picture to my camera gallery.
The name of the editing app is Aviary. This is what it looks like in the App Store. Here is a link to this app – https://appsto.re/us/W-cCF.i

3. Next, I opened another app, Piclab HD. Here is where I was able to add the text and some artwork to the picture I saved to my gallery from the Aviary app. For your text, there are many fonts and colors to choose from. I found it to be fun to change the font up a little on different words I used in my text.
This is where you can find this app in the app store. PicLab HD: https://appsto.re/us/lSUbP.i

4. Now that I had my pictures looking just like I wanted them, it was time to save them to my camera photo gallery and upload the pics to a one-hour photo center and order two 8×10 prints.
5. Of course, I needed a beautiful frame to go with my lavish creations. Hobby lobby. The picture frames were 50% off (woohoo!).
6. After picking up my pictures from the one-hour photo booth, I stuck them into their frames and had them hung on the wall.
So, that is how I made two lovely 8×10 pieces of photo artwork for my daughters room and only spent a grand total of $25.00….for everything.

Wow! The photos are lovely!
I have been wanting to learn how to add Scripture to photos – thanks for the guidance!
LikeLiked by 1 person
Thank you! I had fun making them. I was so excited when I first discovered how to do it!
LikeLike